
Last weekend I spent the afternoon gathering materials and putting together my herb garden. It was a very therapeutic 2 hours full of water color painting and packing soil. As I was putting together my garden it reminded me of the countless hours my parents would spend outside in our garden. Growing up at times it was difficult for me to appreciate this process because well what 12 year old wants to be outside in hot as hell SoCal weather pulling weeds or trimming plants with bugs flying around? However now looking back, I really miss those days. There were times I'd sit on the steps outside to watch my dad blare his music and garden up a storm. My dad and I had a really strained relationship for most of my young life but now looking back he communicated so many important lessons through those hours of verbal-less gardening: be patient, care for things as you'd want them to care for you, a good music playlist is always important, and sometimes you need to be silent to really listen to what's going on around you.
Well, let me just say that the prospect of seeing these little plants grow in 2-3 weeks is very exciting so please pray that I manage to care for them properly! I'll keep you updated!
*Herb Garden Guide:
plant pots and saucers
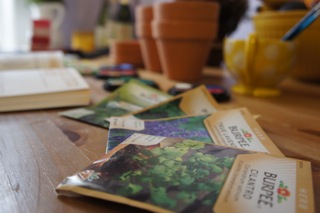
desired seed packages
plant soil (preferably organic)
herb markers (here and here are some cute ones to purchase or just make your own out of paper like I did)
watercolors (to decorate the pots)
a designated area that isn't always directly in the sun
water
Steps:
 |
| Paint pots as desired |
 |
| Create plant labels out of small squares with the name of the herb. |
 |
| Scoop soil into the pot and leave about 1 inch of space at the top |
 |
| Create a little hole about 1/6th of the way down to place seeds in |
 |
| Place seeds in, cover with soil, and pat down to make sure they're packed tightly |
 |
| Stick labels to a popsicle stick with washi tape or unused plastic knife, talk about up-cycling! |
 |
| Hemingway looks on intently |
 |
| Place saucers under the pots and water until the soil is moist. Ensure that you don't water the plants too much (i.e. when water fills up the saucer) as you can drown the plants and prevent growth. Place near a window and enjoy the process! |
Hey Elvia, your pots look great, the plastic knife thing was a nice touch. This is like the only girly blog I ever read, but it's actually really good. You're a great writer and your photos go with the article nicely.
ReplyDeleteHehe thanks Brian, that's very flattering and humbling to hear.
ReplyDelete